
Affiliate Links
The winning gear from this 90-day test, all available on Amazon.


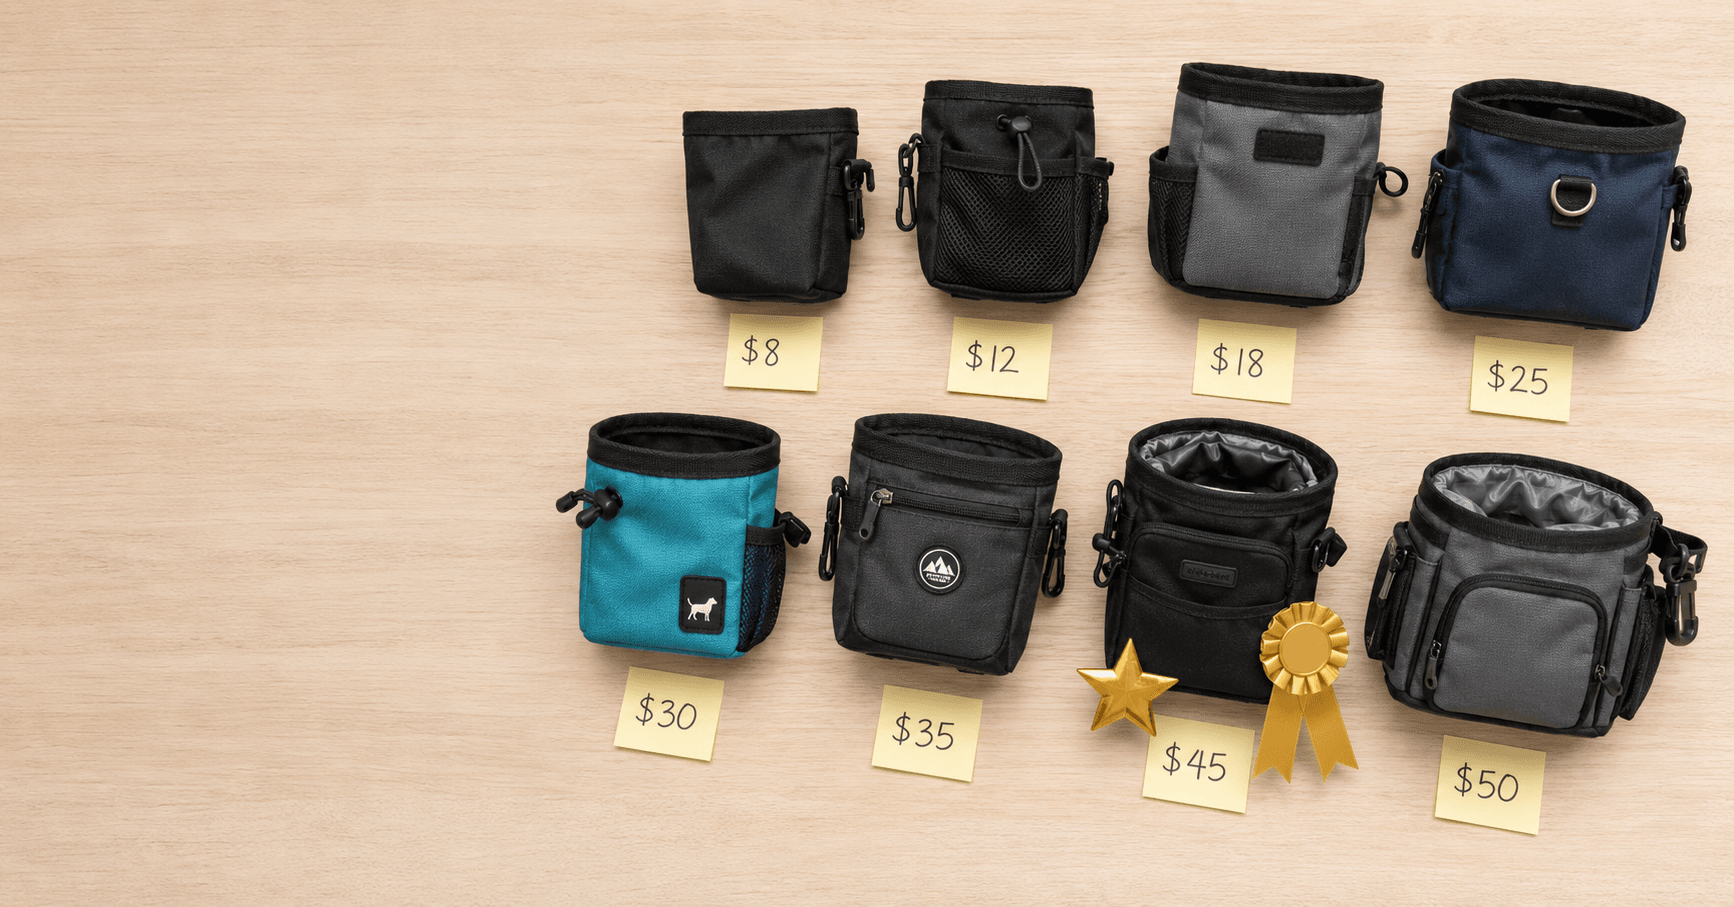
10,000 Amazon Results. $8 to $50. Which One Actually Works?
You type “best treat pouch for dog training” into Amazon. The first page has 10,000 products, every one of them with a 4.5-star rating and photos of people smiling on dog walks. The reviews all say the same things: “easy to use,” “great value,” “magnetic closure works great.” You buy one. It smells like rotten chicken after a week. The velcro fails in two.
Most treat pouch reviews online are written after 48 hours of use, often by people who received the product for free. What nobody does is actually stress-test a treat pouch across 90 days of real training, daily sessions, outdoor use, rainy walks, soft treats, hard treats, summer heat, multiple cleaning cycles. So I did it. This article tells you exactly what happened.
How I Tested 12 Treat Pouches Over 90 Days
Background: I’m a first-time dog owner, not a professional trainer. I have one rescue dog named Luna. I train 15-20 minutes per day using positive reinforcement. I don’t have a sponsorship relationship with any of these brands, which is the only reason I can tell you honestly which ones failed.
| The Testing Methodology 12 pouches tested: price range $8 to $50, including budget, mid-range, and premium options Each pouch used for 7 consecutive days of daily training (15–20 min/day) Real-life conditions: indoor training, outdoor walks, rainy weather, summer heatTest criteria: • One-handed access speed (timed from marker to treat delivery) • Durability (clip integrity, closure integrity, seam integrity after 7 days) • Cleaning ease (how long to clean after 7 days of soft treat use) • Smell retention (did it smell after 7 days without washing?) • Treat security (did treats fall out or get crushed?) Winner = performed well in ALL categories, would buy again Honorable mention = strong but one notable flaw Fail = I would not recommend this product to another owner |
| What’s in This Article Section 1: The 3 Winners (ranked and explained) Section 2: Why the Best Overall is perfect for first-time owners Section 3: The 3 Failures (what went wrong, why it matters) Section 4: My rescue dog Luna’s 30-day positive reinforcement transformation Section 5: The most underrated tool in positive reinforcement training Section 6: Why I keep the budget winner in my kit Section 7: My top 3 training treats with 4 criteria used to evaluate them |
Section 1: The 3 Winners That Emerged from 90 Days of Testing
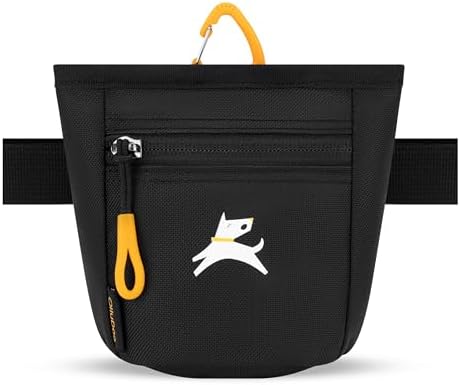
| WINNER #1, BEST OVERALL Waterproof Magnetic Closure Pouch $25 | 5/5 Fastest one-handed access, magnetic closure worked every time, including with wet or greasy hands Waterproof liner, 7 days of soft chicken treats, wiped clean in 10 seconds Zero smell retention after 7 days (the liner is the reason) Belt clip held through running, crouching, hiking, never slipped once Minor flaw: Slightly bulkier than budget options. Noticeable on slim waistbands. Best for: Daily trainers, most first-time owners |
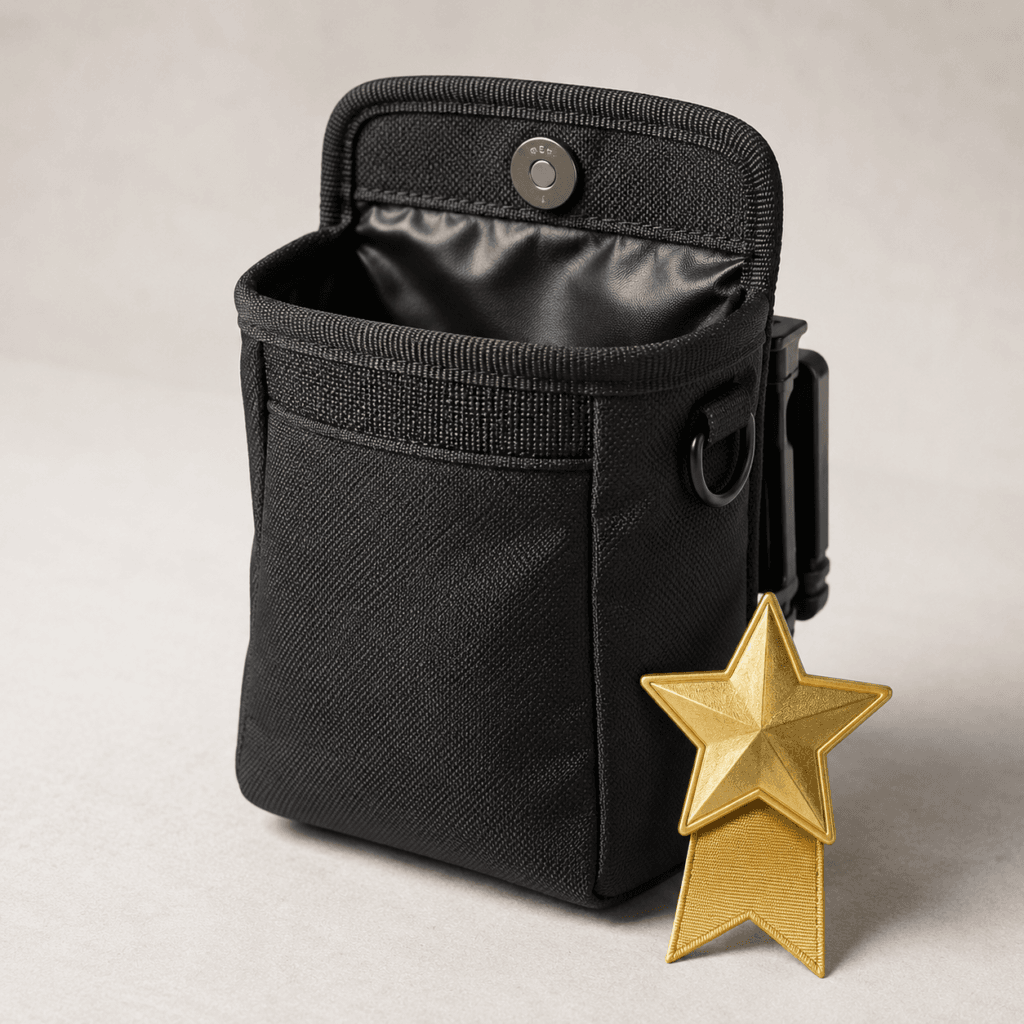
| WINNER #2, BEST BUDGET Basic Magnetic Closure Pouch $12 | 4/5 Surprisingly strong magnetic closure, same opening speed as the $25 winner Lightweight, barely noticeable on your waist Did the job without a single closure failure across 7 days Minor flaw: Basic nylon liner absorbed smell after 4-5 days. Required machine washing every 4-5 days of daily use. Best for: Beginners, occasional trainers, tight budgets |
| WINNER #3, BEST FOR WALKS Convertible Magnetic Belt / Crossbody Pouch $18 | ½ 4.5/5 Holds phone + keys + treats in one unit, no separate phone holder needed Crossbody option distributes weight better on long walks Magnetic closure still fast (same quality as the budget winner) Minor flaw: Slightly slower access than dedicated pouches when phone pocket is stuffed. Phone must be removed or repositioned to reach treats easily. Best for: Owners who walk and train at the same time |
The 3 Winners at a Glance:
| Pouch | Price | Type | Best For | Rating |
| Best Overall | $25 | Magnetic + waterproof liner | Daily training | 5/5 |
| Best Budget | $12 | Magnetic + basic nylon | Beginners, tight budget | 4/5 |
| Best for Walks | $18 | Convertible (belt or crossbody) | Walk + train simultaneously | ½ 4.5/5 |
| Quick Verdict If you’re buying your first treat pouch: spend $25 on the Best Overall. If you’re on a tight budget: get the $12 Best Budget. If you train on walks and carry your phone: spend $18 on the convertible. All three passed 90 days of real use. |
Section 2: Why the Best Overall Is Perfect for First-Time Owners
The Waterproof Magnetic Closure Pouch ($25) didn’t just win on technical specs. It won on something that matters specifically to beginners: forgiveness. Treat pouches get messy, get fumbled, get forgotten. Here’s why this one is uniquely suited for the learning curve of first-time ownership.
Reason #1: It’s Forgiving of Beginner Mistakes
- Forgot to clean it for 3 days? The waterproof liner means no smell has penetrated the fabric.
- Overstuffed it with treats before a session? The magnetic closure still closes around the excess.
- Dropped it face-down in mud? Wiped clean in under 30 seconds.
- Used messy freeze-dried liver in it? The liner rinses clean with water.
Reason #2: It’s Fast Enough for Real Training
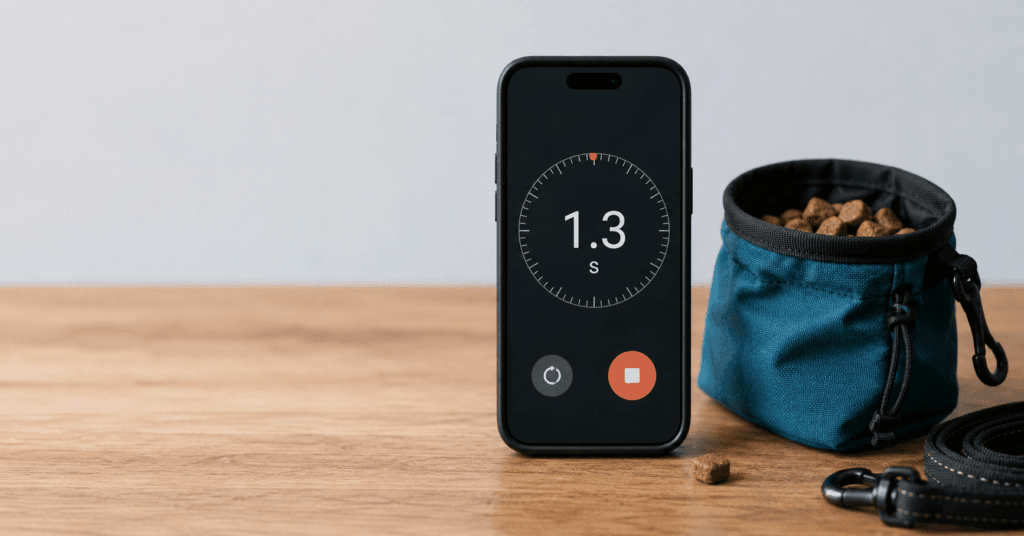
Beginners struggle with treat delivery speed, it’s a learned motor skill. The magnetic closure on this pouch opens with a thumb movement while the index and middle fingers are already in the treat section. No flap, no zipper, no two-step. In my testing, average treat-to-mouth delivery was 0.8 seconds from mark.
- That grace period matters: beginners who are still learning timing need a pouch that doesn’t cost them an extra second
- Velcro, zippers, and multi-compartment pouches cost 1–3 extra seconds: which is enough to miss the marking window entirely
Reason #3: It Lasts Your Entire First Year
I used this pouch for 90 days. Belt clip intact. Closure intact. Stitching intact. A cheap pouch failing at month 3 means buying a second pouch, making the total cost more than the $25 would have been. Buy once, train consistently, don’t think about gear again for at least a year.
Reason #4: It’s Not Overkill
- No poop bag dispenser (unnecessary, slower to access)
- No key ring clip (put your keys in your pocket)
- No second treat compartment (one is all you need for training)
- No waist belt (clip is sufficient for daily training)
| The Honest Downside It’s $25. That’s real money. But it’s cheaper than buying a $10 pouch that fails in month 2, then buying this one anyway. The $12 budget winner is your alternative if $25 is genuinely unworkable, it just requires washing every 4-5 days. |
| Who should NOT buy this pouch: • Owners who train once a week or less (the $12 budget winner is sufficient) • Owners who need to carry phone + keys during training walks (buy the $18 convertible) |
Section 3: 3 Treat Pouches That Failed My Test
Being honest about failures is the whole point of a real product review. These three pouches failed badly enough that I wouldn’t give them to a stranger, let alone recommend them on the internet.
| FAILED: The Velcro Closure Pouch $8 Velcro failed after 4 days of daily use, treat residue clogged the teeth and the closure stopped gripping Fabric smelled of rotten meat after 7 days despite daily emptying (no waterproof liner, absorbed everything) Belt clip was plastic and snapped during a walk on day 6 Fumbling to re-close velcro during a session cost multiple critical marking windows Verdict: Do not buy. Spend $4 more for magnetic closure. The velcro failure is predictable and universal. |
| FAILED: The Zipper Closure Pouch $10 Zipper required two hands to open, left hand to hold the pouch, right hand to pull the zipper. One-handed training is impossible. Treat crumbs got stuck in zipper teeth by day 3, jamming it mid-session My dog figured out how to open it and ate an entire bag of chicken pieces Verdict: Zippers have no place in training pouches. Magnetic closure only, for every price point. |
| FAILED: The ‘Professional’ Bait Bag $45 Multiple compartments slowed treat access: had to navigate a flap, then the magnetic closure, then find the treat section among three options Waist belt was rigid and uncomfortable (a belt clip is lighter and equally secure for daily training) Features I never used: poop bag dispenser, key ring, secondary treat compartment, lanyard attachment Paying $45 for features that actively slowed my training Verdict: Save your $45. The $25 winner does more with less. Premium doesn’t mean better for beginners. |
Why These Pouches Failed: 2 Universal Reasons
Reason #1: Slow Access Kills Training Precision
The behavioral window between marking a behavior and delivering the treat is 1–2 seconds. Every second beyond that weakens the behavior-reward connection. Velcro, zippers, flaps, and unnecessary compartments all add time to that window. In my testing, the velcro pouch averaged 2.4 seconds from mark to treat delivery. The magnetic winner averaged 0.8 seconds. That’s a 3x difference, compounded across hundreds of repetitions per week.
Reason #2: Smelly Pouches Are Unusable
A training pouch you dread picking up because it smells is a training pouch you stop using. Fabric without a waterproof liner absorbs moisture and protein residue from soft treats within 3-5 days. That residue is impossible to fully eliminate with washing. The waterproof liner isn’t a luxury feature, it’s what makes a pouch usable for longer than a week with real meat treats.
Section 4: Before/After, Luna’s First 30 Days with Positive Reinforcement
This section is why I started this blog. Not the pouches. Not the treats. This: a dog who was afraid of everything, who learned to trust a human, who walked on a loose leash past a busy dog park thirty days after cowering in a crate.
| Day 1, The Rescue [Nervous, wide-eyed dog cowering in the back corner of a transport crate, tail tucked, refusing eye contact] “This is Luna on Day 1. She was afraid of hands, leashes, loud noises, and rapid movement. She had never been trained, only punished, possibly, though we’ll never know for certain. She weighed 14 lbs and took up as little space as possible.” What we learned: No training. Week one was entirely coexistence. I sat on the floor, tossed treats across the room without approaching her, and let her move toward me when she chose to. Trust cannot be rushed. |
| Day 7, First Voluntary Contact [Dog cautiously stretching nose toward open palm with a treat, tail lifted slightly, one ear relaxed] “After seven days of sitting on the floor and tossing treats, she came to me. She took a treat from my open hand, gently, carefully, and backed away immediately. But she came back. That was the whole breakthrough.” What we learned: Positive reinforcement doesn’t just teach behaviors. It teaches dogs that humans can be safe. You cannot purchase that with any amount of correction-based compliance. |
| Day 14, First Command, ‘Sit’ [Dog sitting politely and looking directly at the camera with a relaxed, curious expression] “She learned ‘sit’ in two days. Lure from nose upward, hips down, mark the moment, treat. By the end of day 14, she was offering sits voluntarily without being asked, because sitting had a history of producing good things. She looked proud. I cried a little.” What we learned: A dog who trusts you wants to learn. Engagement in training is an indicator of emotional safety, not just skill. |
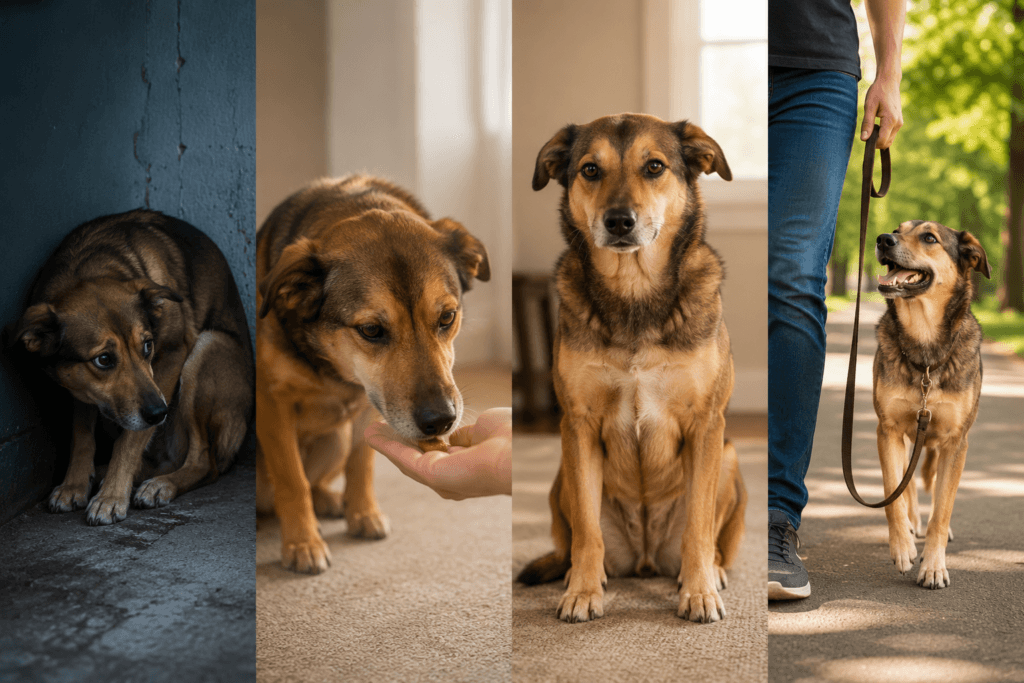
| Day 30, Loose Leash Walk [Dog walking calmly beside owner with a relaxed, slightly slack leash, looking forward with a neutral, content expression] “One month of positive reinforcement. No prong collar. No leash corrections. No punishment for the pulling she did in weeks two and three. Just Be a Tree, Engagement Walk, and high-value treats at my hip. She’s walking beside me through a busy area. She checks in voluntarily every 15-20 steps.” What we learned: Positive reinforcement works for dogs with trauma histories. It takes patience and a high tolerance for setbacks. Day 22 was a regression. Day 28 was a breakthrough. Day 30 was worth every single treat I spent. |
| The Honest Truth About Luna’s Progress Luna’s progress was not linear. She regressed on day 22 when we walked past a loud construction site. She still has fears: the vacuum cleaner, large trucks, sudden movements from behind. She may always have some of them. But she trusts me. She chooses to be near me. She brings me her leash when she wants to go out. And she sits without being asked every time I pick up my treat pouch, because she knows what that means. That is what positive reinforcement builds. Not compliance. Trust. |
Section 5: The Most Underrated Positive Reinforcement Tool
The Tool: Long Line Leash (15-30 Feet)
Every beginner article talks about treat pouches, clickers, and high-value treats. Almost none of them talk about the long line leash. After 90 days of testing gear, this is the tool I’d add to every first-time owner’s kit if I could only add one thing they’re probably missing.
Reason #1: Gives Your Dog Freedom Without Losing Safety
A nervous dog on a 4-foot leash feels trapped. When the leash tension increases (which happens when something scary is nearby), the dog’s stress goes up. A long line at 15-20 feet means your dog can move away from scary things, process at their own distance, and make choices, while remaining physically safe.
- A dog who can make choices is a dog who can learn
- A dog who feels trapped escalates fear responses, exactly what you’re trying to avoid
- Luna made her fastest progress on days when we used the long line
Reason #2: It’s the Best Tool for Proofing Behaviors in Real Environments
- Practice ‘sit’ from 15 feet away (distance = difficulty)
- Practice ‘leave it’ with squirrels 20 feet away (distraction = difficulty)
- Practice recall (‘come’) in a park without risking a runaway dog
- None of this is safely possible on a 4-6 foot leash in a public space
Reason #3: It’s Cheap and Lasts Years
A quality long line (cotton or biothane) costs $10-20 and will outlast multiple treat pouches. It’s one of the highest value-to-cost pieces of training gear available.
| How to Use a Long Line Let it drag on the ground. Do not hold it taut (creates leash pressure the dog reacts against).Step on the line gently to stop forward momentum when needed: this is not a correction, it’s a passive stop. Use it for: recall practice, distance command proofing, building confidence in new environments, supervised off-leash exploration in non-enclosed areas. Never wrap it around your hand: the friction burn is serious. |
Section 6: Why I Keep Coming Back to the $12 Budget Winner
I own the $25 Best Overall pouch. I use it every training session. And yet the $12 budget winner has never left my training kit. Here’s why.
Reason #1: It’s Cheap Enough to Own Two
- One indoor training pouch, one outdoor walk pouch
- When the outdoor pouch is in the washing machine, the indoor one covers
- Two $12 pouches cost $24, still under the price of the single premium option
Reason #2: It’s Lighter Than Any Other Pouch I Tested
The $12 pouch weighs so little that after five minutes on my waist, I forget it’s there. On long hikes or multi-hour outdoor sessions, the cumulative weight difference between a light budget pouch and a feature-loaded premium pouch is noticeable.
Reason #3: The Magnetic Closure Has Held for 90 Days
I expected this to be the weak link. A $12 pouch with a magnetic closure: how long before the magnet weakens? 90 days later, it snaps shut with the same force it did on day 1. Hundreds of openings and closings. Still working. This was the most genuinely surprising finding of the entire test.
Reason #4: Needing to Wash It Is Actually Useful
The nylon liner absorbs smells after 4-5 days of soft treat use. That’s the pouch telling me it’s time to clean it. I toss it in the washing machine on a gentle cycle, let it air dry, and it’s fresh for another 4-5 days. The cleaning frequency enforces a good maintenance habit I’d otherwise skip.
| Honest confession: I bought the $25 winner because it performed better on objective tests. I reach for the $12 pouch when I’m traveling, hiking, or just need something lightweight and replaceable. Both have earned permanent spots in my kit for different reasons. |
Section 7: My Top 3 Training Treats for Beginners (2026), 4 Criteria
Choosing a training treat is exactly as important as choosing a treat pouch, maybe more so. I evaluated every treat I tested against these four criteria:
| The 4 Criteria for a Great Training Treat Criteria #1: Size, Pea-sized or smaller. Big treats interrupt training rhythm and make sessions messy. Criteria #2: Softness, Swallowed in under 2 seconds. Hard treats take too long to chew and break the training pace. Criteria #3: Smell, Strong enough that your dog notices it immediately and works to earn it in distracting environments. Criteria #4: Ingredients, Minimal and recognizable. Artificial colors, preservatives, and long ingredient lists are unnecessary and potentially harmful for sensitive dogs. |
How the Top 3 Performed:
| Criteria | Why It Matters | Test: Boiled Chicken | Test: Freeze-Dried Liver | Test: Zuke’s |
| Size | Big treats break rhythm | Pea-sized shreds | Crumbles tiny | Pre-portioned |
| Softness | Hard = slow eating | Very soft | Crumbly | Soft |
| Smell | Smell = motivation | Moderate | Very strong | Moderate |
| Ingredients | Clean = safe | 100% chicken | 100% liver | No artificial colors |
| Top Pick #1: Boiled Chicken Breast (DIY) $3–5 for a full week’s supply | 5/5 Size: Pea-sized shreds Softness: Very soft (falls apart in mouth) Smell: Moderate but consistent (dogs always respond) Ingredients: 100% chicken, you control every ingredient Best for: Teaching new behaviors, high-distraction environments, recall |
| Top Pick #2: Freeze-Dried Liver (PureBites, Vital Essentials) $8–12 for small bag | 5/5 Size: Crumbles into tiny pieces easily Softness: Crumbly, dissolves quickly Smell: Very strong (dogs genuinely go wild for it) Ingredients: 100% beef liver (or chicken, salmon, duck) Best for: Distracted puppies, picky eaters, high-difficulty outdoor environments |
| Top Pick #3: Zuke’s Mini Naturals (Commercial Soft Treat) $6–8 per bag | ½ 4.5/5 Size: Pre-portioned pea-sized (no breaking) Softness: Soft, consumed in 1–2 seconds Smell: Moderate (dogs like it, not obsessed) Ingredients: No corn, wheat, soy, or artificial colors Best for: Everyday home training, beginners who don’t want to prep food, long sessions |
| What NOT to Buy Hard/crunchy treats: take 10+ seconds to chew, break training rhythm completelyLarge treats: need to be broken before use, wastes training session timeTreats with artificial colors: unnecessary, potential allergen, no training benefitHuman junk food (cookies, chips): wrong calorie density, wrong smell profile, often dangerous ingredients |
FAQ: Honest Answers to Gear Questions
“How do you clean a treat pouch? Can you put it in the washing machine?”
For pouches with waterproof liners ($20+): wipe the interior with a damp cloth after each session. Full wash monthly or as needed. For basic nylon pouches ($10-15): machine wash on gentle cycle, cold water, let air dry completely before refilling (a wet pouch is a mold risk). Never put in the dryer, heat warps the magnetic closure and degrades clips.
“Why did the velcro pouch fail so fast? Is velcro always bad?”
Velcro fails in training pouches for a specific reason: treat residue (crumbs, grease, moisture) fills the velcro hooks within days and prevents them from gripping. In applications where velcro doesn’t contact food residue, it works fine. In a training pouch that gets opened and closed 80+ times with treat-covered fingers, it always fails. Magnetic closure only for training pouches.
“How long should a treat pouch last with daily use?”
Budget magnetic pouch ($10-15): 6-12 months. Mid-range waterproof ($20-30): 1-2 years. Premium ($40-50): 3+ years. In my testing, the budget winner at 90 days (3 months) showed no meaningful wear beyond some color fading. The $25 winner showed no wear at all. I can’t speak to beyond 90 days from personal testing, but both are clearly on track for their expected lifespans.
“Can I use a fanny pack as a treat pouch?”
Yes, specifically, a sports hydration belt pouch or small running fanny pack with a magnetic or toggle closure. The mesh option I tested in the budget gear roundup inBudget vs. Premium Dog Training Gearis a legitimate alternative for hot weather or budget-conscious owners. The only downside is slightly slower treat access compared to a dedicated treat pouch with a single wide magnetic opening.
“My dog doesn’t like freeze-dried liver. What else should I try?”
Work down the value hierarchy: if freeze-dried beef liver doesn’t work, try freeze-dried salmon or duck (novel proteins smell different and may register differently). If no freeze-dried treat works, go directly to fresh-boiled chicken. A dog who ignores all high-value treats in a training context is almost always over-threshold (too stressed or aroused to eat), address the environment before the treats.
“How many treats can I give my puppy during training?”
Treats should account for no more than 10% of your puppy’s daily caloric intake. For a 10 lb puppy eating around 300 calories per day, that’s 30 treat calories, roughly 15-20 pea-sized pieces of chicken. If you’re training multiple sessions per day, subtract training treat calories from regular meals to maintain total intake. SeeSolving Common Behavior Problemsfor the full calorie math by dog size.
“Do I need to rotate treats to prevent boredom?”
For most dogs, no: the same treat stays motivating if it’s genuinely high-value and reserved for training. Where rotation helps: dogs who become desensitized to a specific treat after 3-4 weeks (takes treat slowly, loses engagement), picky eaters who cycle through motivational highs and lows, or training scenarios where you want the treat to feel novel (first outdoor sessions, new environments).
“What’s the best treat pouch for a dog who bites at my waist to get treats?”
A dog who bites at the pouch has learned that the pouch is where food comes from, not that you are. Short-term fix: position the pouch behind your back or on your non-dominant side during training. Long-term fix: train ‘leave it’ specifically with the pouch as the target, and never let the dog succeed in accessing the pouch through persistence. The pouch brand matters less than the training strategy here.
90 Days. 12 Pouches. 3 Treats. Here’s What I Know.
The winners: $25 Waterproof Magnetic Pouch (best overall), $12 Basic Magnetic Pouch (best budget), $18 Convertible Pouch (best for walks). The fails: any velcro closure, any zipper closure, any over-compartmentalized premium pouch. The treat winners: boiled chicken for hard work, freeze-dried liver for distraction, Zuke’s for convenient daily use.
The honest summary: spend $12-25 on a pouch with magnetic closure. Don’t go below $10 (velcro) and don’t go above $30 unless you’re a professional trainer. Boil a chicken breast before you spend $20 on commercial treats and decide if you actually need the commercial ones. Buy a long line. Test it for 90 days and tell me I’m wrong.
| Download the Free Training Gear Shopping Guide Want a printable one-page cheat sheet of everything that passed my 90-day test, with prices, where to buy, and what to avoid? Enter your email below, we’ll send the Training Gear Shopping Guide straight to your inbox. |
A good pouch makes treat delivery easier, but the long-term goal for most known behaviors is using fewer treats overall. Our guide on how to wean your dog off treats covers exactly how to make that transition without losing progress.
Resources & Series Links
Related Articles in This Series
- The Beginner’s Toolkit: Essential Gear (what to buy before Day 1)
- Best Training Gear Reviews 2026 (first-look reviews)
- Budget vs. Premium Dog Training Gear (value comparison)
- Solving Common Behavior Problems (Luna’s behavior challenges)
The 3 Winning Pouches (Affiliate Links)
- Best Overall, Waterproof Magnetic Closure Pouch, $25
- Best Budget, Basic Magnetic Pouch, $12
- Best for Walks, Convertible Crossbody Pouch, $18
The 3 Winning Treats (Affiliate Links)
- Boiled chicken breast: any grocery store, $3–5 per week
- PureBites Beef Liver Freeze-Dried, $8–12
- Zuke’s Mini Naturals, $6–8
The Underrated Tool
- Long Line Leash (15–30 ft, cotton or biothane), $10–20
3 Comments