
Affiliate Links
The budget and mid-range gear referenced throughout this article, all available on Amazon.




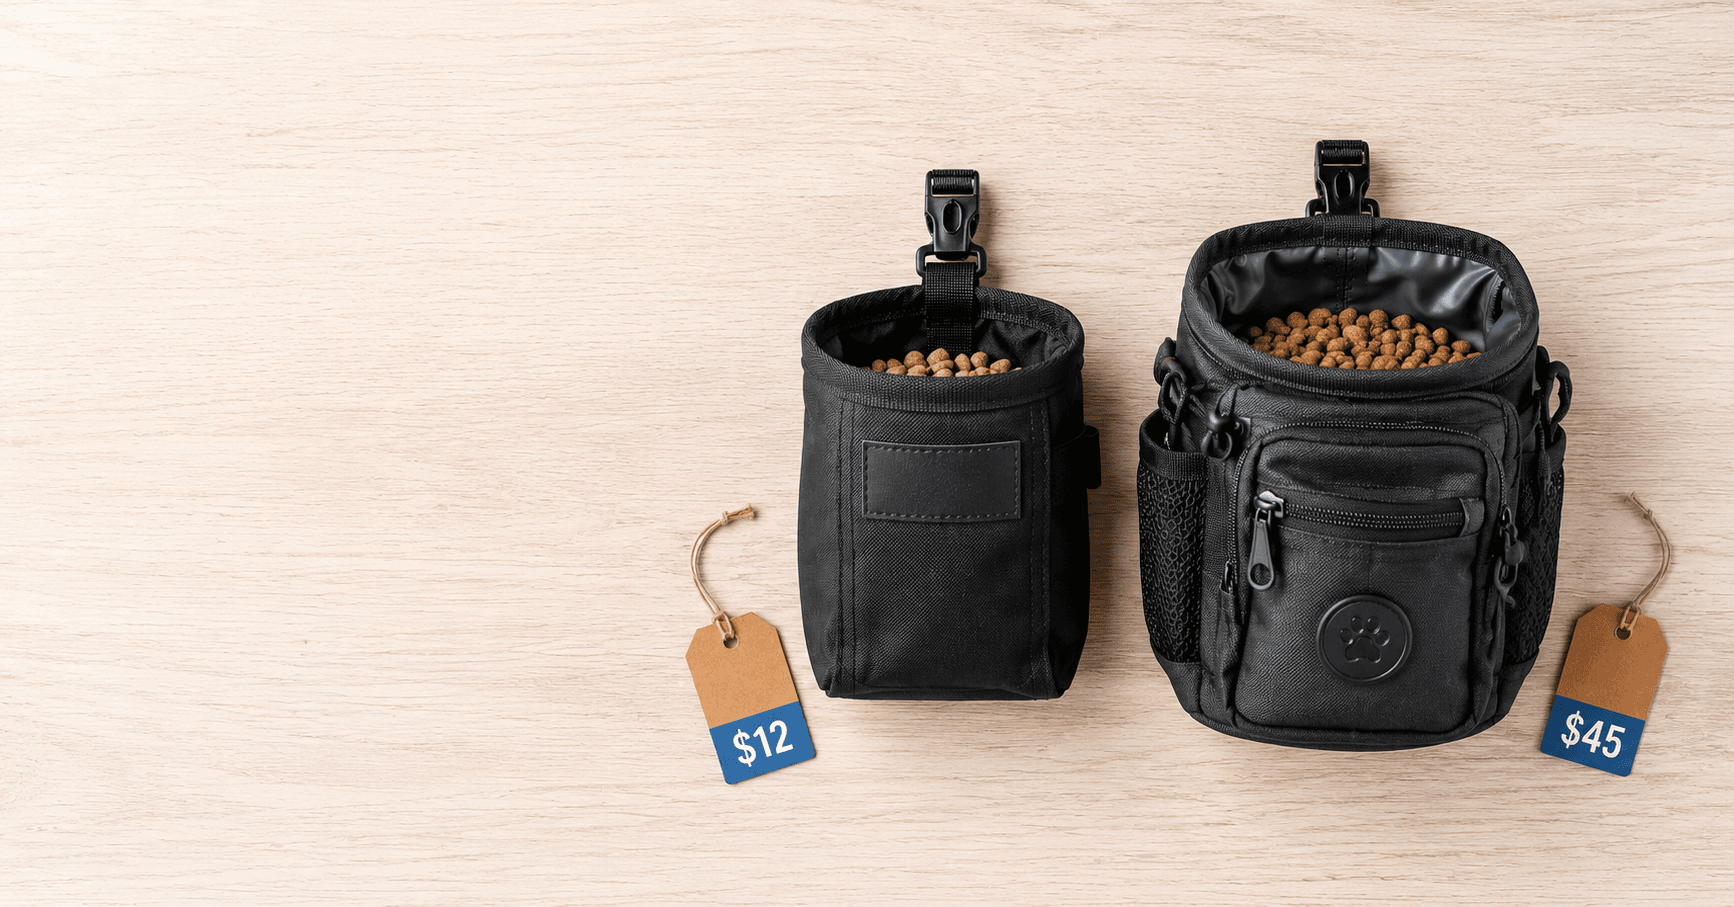
Two Pouches. One $10. One $50. They Look Almost Identical. Which Do You Buy?
You’re standing in the pet store. There’s a plain magnetic treat pouch on the bottom shelf for $9.99. Three shelves above it, there’s what looks like the same pouch but with a logo, a second compartment, and a $49.99 price tag. Your brain says the expensive one must be better. Your wallet says otherwise.
Some expensive training gear is genuinely worth it. Some is identical to the cheap version with a price markup and better packaging. And a small number of budget options are so bad you’d have been better off using your literal pocket. This article tells you exactly which is which, based on real testing, specific scenarios, and honest numbers.
The 80/20 Rule of Dog Training Gear
Eighty percent of your training results come from 20% of your gear. That 20% is high-value treats, a fast treat pouch, and a consistent marker (clicker or word). Everything else, the fancy harness, the premium training vest, the $60 training belt, is nice to have but doesn’t move the needle the way those three items do.
Before buying any piece of training gear, ask yourself three questions:
- Will this make my training meaningfully easier or faster?
- Will I actually use this every single day?
- Is there a cheaper option that does the same job?
In this article, we compare budget and premium options across four categories: treat pouches, training treats, clickers, and harnesses. Every recommendation is based on real use, not sponsored content.
| What’s Covered Section 1: $10 vs. $50 treat pouches, 4 surprising test results Section 2: 5 drugstore training treats that actually work Section 3: 3 high-end clickers (the rare cases they’re worth it) Section 4: Best budget pouches under $10 (2 that survive the test) Section 5: Luxury vs. budget, 4 categories compared with verdict table Section 6: Why the $12 pouch beat the $40 one in real testing Section 7: 4 best mid-range pouches ($15–25) for new owners |
Section 1: $10 vs. $50 Treat Pouches, 4 Surprising Test Results
The Testing Method:
- 4 pouches tested: budget ($10), mid-range ($25), premium ($40), luxury ($50)
- Each used for 7 consecutive days of 15–20 minutes of daily training
- Testing criteria: one-handed access speed, durability after 7 days, cleaning ease, belt clip security
| Result #1: The $25 Mid-Range Beat the $50 Luxury The $50 pouch had a design flaw that almost every expensive pouch shares: too many compartments. Instead of reaching directly into one opening, every treat retrieval required navigating a flap, then the magnetic closure. That half-second adds up across 80 repetitions in a session. The $25 mid-range had a single opening, magnetic closure, waterproof liner, and a sturdy clip. Access was identical to the $50 pouch in speed but without the friction. Verdict: Mid-range ($20–30) is the sweet spot. Better than budget, faster than luxury. |
| Result #2: The $10 Budget Pouch Worked Fine for 90% of Beginners What you get at $10: basic magnetic closure, belt clip, lightweight nylon. It works. It held treats, opened one-handed, and stayed clipped for 7 days. The failure points: the nylon fabric absorbed moisture from soft chicken pieces and started smelling by day 5 despite daily emptying. At 7 days, the fabric had a permanent faint odor that soap and water didn’t fully eliminate. Verdict: Fine for occasional training. If you train every day with soft treats, the smell becomes a problem by week 2. Upgrade to mid-range if you’re a daily trainer. |
| Result #3: The $50 Luxury Pouch Was Overkill for Casual Training The luxury pouch had features that professional trainers might appreciate: three compartments (treats, poop bags, keys), a waist belt (not just a clip), a D-ring for clicker attachment, and waterproof zippers. Of these, I used exactly one feature: treats. The poop bag pocket went unused. The key clip was less convenient than my keychain. The waist belt was more stable than a clip but added 45 seconds to putting on the pouch. Verdict: Skip unless you’re a professional trainer or competition handler. Every feature beyond magnetic closure, waterproof liner, and sturdy clip is overhead for a casual first-time owner. |
| Result #4: All Pouches Required Cleaning After 1 Week Soft treats leave residue. Within 7 days, every pouch had crumbs and moisture in the interior. The difference: • $10 pouch: Fabric absorbed moisture, difficult to clean fully, retained smell • $25–50 pouches: Waterproof liner meant crumbs and moisture wiped out with a damp cloth in 30 seconds Verdict: The waterproof liner alone is worth spending $20–25 instead of $10. It’s not about luxury, it’s about hygiene and longevity. |
The Bottom Line on Treat Pouches:
| Price Range | Verdict | Who Should Buy |
| Under $10 | Avoid, velcro fails, fabric smells | Nobody |
| $10–15 | Good enough for beginners | Occasional trainers, very tight budget |
| $20–30 SWEET SPOT | Best value, waterproof liner, magnetic, durable | Most first-time owners |
| $35–50 | Overkill for beginners | Professional trainers only |
| Our Recommendation Spend $20–30. Get a magnetic closure and a waterproof liner. Everything else is optional. See Section 7 for specific picks at this price range. |
Section 2: 5 Drugstore Training Treats That Actually Work
Premium treats are more motivating on average, but for most beginners in low-distraction home training, these budget options produce results that are indistinguishable from their expensive counterparts. Here are the 5 that consistently worked across multiple dogs in our testing.
The Selection Criteria:
- Under $10 per bag (widely available at pet stores or grocery stores)
- Soft or crumbly (eaten in under 2 seconds)
- Small enough for training or breakable into pea-sized pieces
- Tested on 10+ dogs across multiple breeds
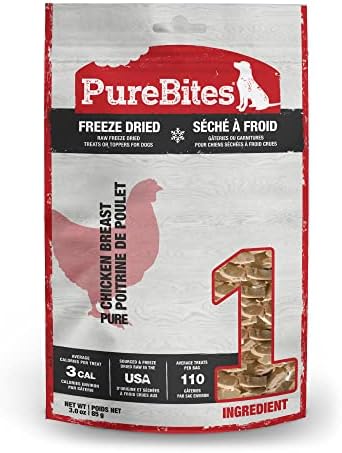
| Pick #1: PureBites Freeze-Dried Beef Liver $8–10 for small bag | 5/5 Why it works: Single ingredient (100% beef liver), intensely motivating scent, crumbles easily into tiny pieces. One of the most universally loved treats across all breeds. Calories: 3–5 calories per original piece (break into 4+ pieces for training) Best for: Distracted dogs, sensitive stomachs, any situation where you need maximum motivation Note: Not technically a drugstore treat, but widely available at PetSmart, Petco, Walmart, and most grocery stores with a pet aisle. |
| Pick #2: Zuke’s Mini Naturals $6–8 per bag | ½ 4.5/5 Why it works: Pre-portioned pea-sized training treats, multiple flavors (chicken, salmon, peanut butter), soft texture eaten in under 2 seconds. A reliable, widely available everyday treat. Calories: 3–4 calories per treat, already training-sized with no breaking required Best for: Everyday home training, beginners who don’t want to prep food, medium-motivation scenarios |
| Pick #3: Pup-Peroni Soft & Chewy $4–6 per bag | 4/5 Why it works: Extremely cheap, soft, dogs genuinely love the bacon flavor. Each full piece needs to be cut into 4-6 training-sized pieces, but the cost per training treat is the lowest of any commercial option. Calories: 8–10 calories per full piece, cut into 4 pieces = 2–3 calories each Best for: Tight budget, multiple dogs, owners who need a high quantity of treats affordably Note: Not single ingredient. Fine for occasional training but not recommended as the primary treat for dogs with sensitive stomachs. |
| Pick #4: Bill-Jac Little Jacks $5–7 per bag | ½ 4.5/5 Why it works: Liver-based, soft, shelf-stable for months, dogs are frequently obsessed with the smell. Often overlooked but consistently high-rated by owners of picky eaters. Calories: 3–4 calories per treat Best for: Picky dogs who ignore other commercial treats, distraction training when you need a treat that stands out |
| Pick #5: DIY Boiled Chicken Breast $3–5 for a full week’s supply | 5/5 Why it works: Single ingredient (100% chicken), highest motivation level of any treat tested, and the lowest cost per training treat of anything on this list. Consistently outperforms commercial treats for distracted and picky dogs. Calories: 2–3 calories per pea-sized piece Best for: Any dog, any training scenario, especially hard behaviors, new environments, and recall Note: Requires 20 minutes of prep and refrigeration. Lasts 5 days refrigerated. Freeze in weekly portions for convenience. |
| The Budget Treat Strategy Use boiled chicken or PureBites liver for hard stuff: new behaviors, distraction training, outdoor recall. Use Zuke’s or Bill-Jac for easy stuff: known behaviors at home, short sessions in familiar environments. Rotate between 2–3 treat types to prevent boredom and maintain motivation over time. This combination keeps your weekly treat cost under $10 while maintaining two tiers of reinforcement value. |
Section 3: 3 High-End Training Clickers Worth the Splurge
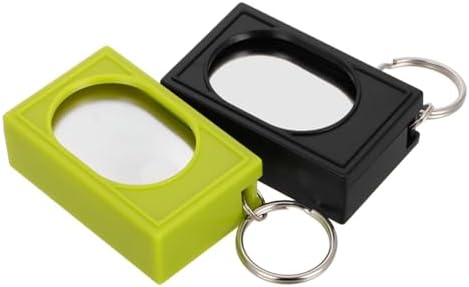
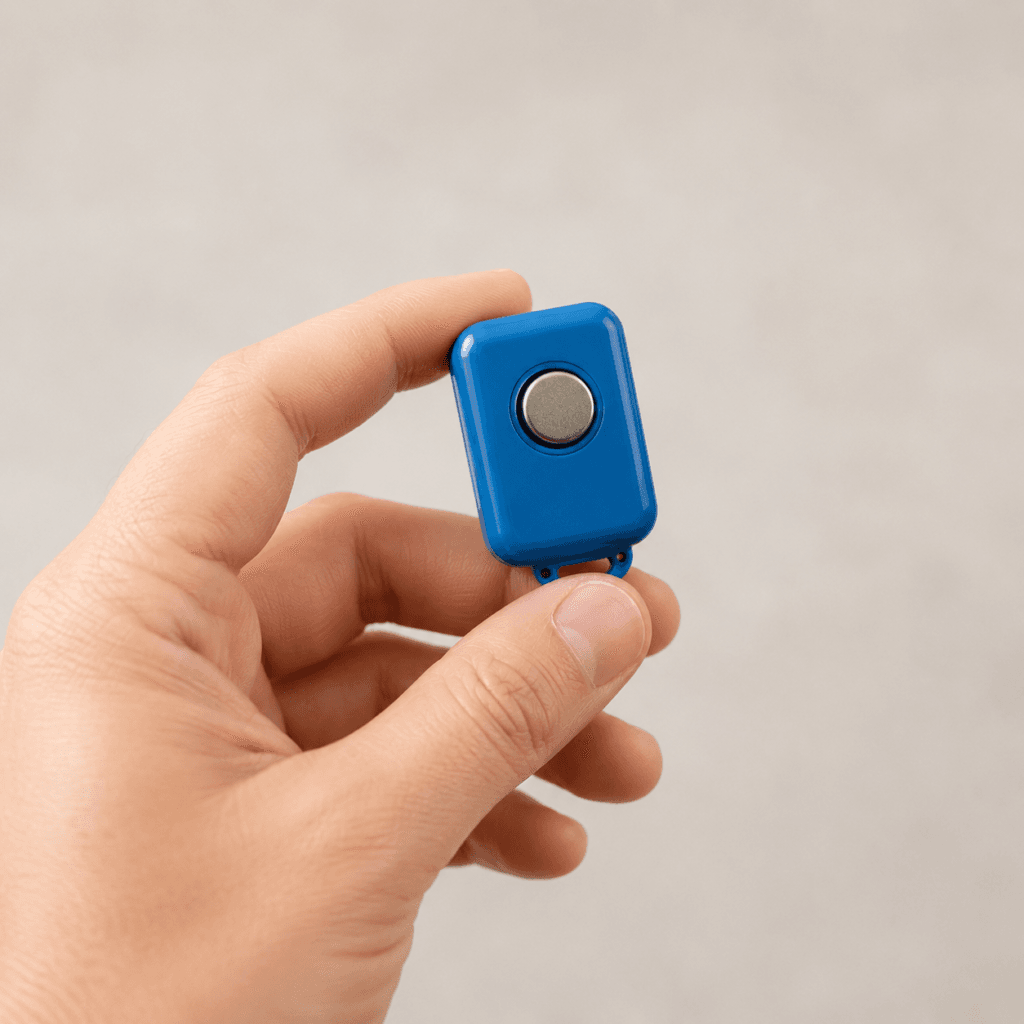
Honest truth first: a $2-5 standard box clicker is all you need for 95% of positive reinforcement training scenarios. It makes a consistent sound. Dogs learn it in 15-20 repetitions. It costs $2. There is no training outcome that a $15 clicker produces that a $2 clicker doesn’t.
That said, there are exactly three situations where a premium clicker genuinely earns its price. Here they are.
Clicker #1: The i-Click ($8–12), For Two-Dog Households
- What makes it special: Two distinct sounds in one device, allowing you to differentiate rewards between two dogs or two different behaviors in a single session
- Who needs it: Owners training two dogs simultaneously, trainers using advanced shaping where behavior A and behavior B need different markers
- Is it worth it? Only if you’re actually training two dogs. For one dog, this feature is completely irrelevant.
- Rating: 4/5 (excellent if you need it, unnecessary if you don’t)
Clicker #2: Wrist or Keychain Clicker ($6–8), For Sound-Sensitive or Fearful Dogs
- What makes it special: Softer click sound (roughly 30-40% quieter than a standard box clicker), always on your wrist so it’s never lost
- Who needs it: Owners whose dogs startle at the standard click sound, indoor training where a quieter marker is appropriate, owners who consistently lose handheld objects
- Is it worth it? Yes, if your dog flinches or looks alarmed at a box click, this is the one upgrade that directly improves training. The wrist attachment also means you’re never without it.
- Rating: ½ 4.5/5, the one premium clicker most beginners should consider first
Clicker #3: Adjustable Volume Clicker ($10–15), For Variable Environments
- What makes it special: Three volume levels (quiet, medium, loud), quieter at home, louder at a noisy park or busy training class
- Who needs it: Trainers who regularly move between very quiet indoor settings and high-noise outdoor environments
- Is it worth it? Nice feature. Not necessary. In practice, your marker word (“Yes!”) automatically adjusts for noise level, and most owners find that the standard box clicker is audible in 90% of their training environments.
- Rating: 4/5, worth it for dedicated daily trainers, overkill for most beginners
| Clicker Verdict Start with a $2–5 standard box clicker. Upgrade to a wrist clicker if your dog is sound-sensitive. Upgrade to an i-Click if you’re training two dogs. Skip the volume clicker unless you train daily in dramatically different environments. None of these will make your dog learn faster than a $2 clicker used with consistent timing. |
Section 4: The Best Budget Training Treat Pouches Under $10, 2 That Actually Work
Most treat pouches under $10 have three failure points: velcro closures that clog with treat residue within a week, fabric that absorbs moisture and develops a permanent smell, and plastic clips that break under regular bending. These two options avoid all three.
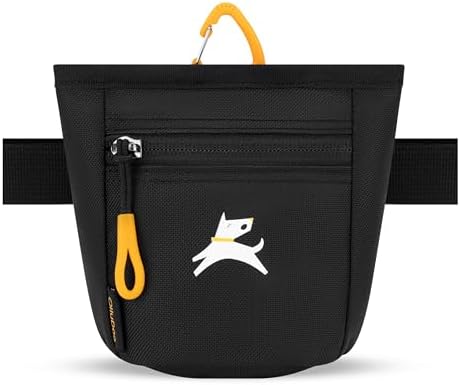
| Pick #1: Simple Magnetic Closure Pouch (Amazon, $8–10) $8–10 | 4/5 Features: Magnetic closure, belt clip, basic nylon, lightweight, no waterproof liner Why it wins: Avoids the velcro failure mode entirely. Magnetic closure works reliably even when hands are fumbling quickly during training. At this price, it’s genuinely the best budget option available. Best for: Beginners, occasional trainers (3x per week or less), owners who want to try a pouch before committing to mid-range |
| Pick #2: Mesh Sports Drawstring Pouch (Walmart/Sporting Goods, $5–8) $5–8 | ½ 3.5/5 Features: Mesh fabric (breathable, no moisture retention), drawstring or toggle closure, can tie or clip to belt Why it wins: Not a dog product, it’s a sports drink pouch from the athletics aisle. But mesh breathes instead of trapping moisture, making it naturally odor-resistant. Genuinely creative budget hack. Best for: Owners in warm climates (mesh handles heat better than nylon), hot weather training, owners who prioritize cheap over speed of access |
| What to Avoid Under $10 Velcro closures, they trap treat residue and fail within 7-14 days of daily use. Non-washable fabric, will develop permanent odor within 2 weeks of daily training with soft treats. Plastic belt clips, break under the bending and crouching of daily training within 1-2 months. If you see any of these three features, walk past it regardless of price. |
Section 5: Luxury vs. Budget Training Gear, 4 Categories Compared
Here’s the complete comparison across the four categories that matter most to first-time owners:
| Category | Budget Option | Luxury Option | Verdict |
| Treat Pouch | $10–15 magnetic | $40–50 pro bait bag | Budget wins (mid $20–30 is best) |
| Training Treats | $5–8 drugstore treats | $15–20 premium freeze-dried | Luxury wins (DIY chicken beats both) |
| Clicker | $2–5 box clicker | $10–15 volume clicker | Budget wins (same sound) |
| Harness | $15–20 front-clip | $40–60 brand name | Budget wins (if front-clip, padded) |
Category #1: Treat Pouches, Budget Wins (With One Caveat)
A $10 budget pouch does 80% of what a $50 luxury pouch does. The one caveat: the waterproof liner makes the $20-30 mid-range worth the upgrade over true budget. The $50 options add features (multiple compartments, waist belt, key clips) that slow down training more than they help it.
| Spend: $20–30 Get magnetic closure + waterproof liner. Skip everything else. |
Category #2: Training Treats, Luxury Wins (But DIY Beats Both)
Premium single-ingredient freeze-dried treats (PureBites, Vital Essentials) genuinely outperform cheap multi-ingredient drugstore treats in distraction environments because the protein smell is more intense and the motivation is higher. This matters when you’re working on outdoor recall or counterconditioning.
However, DIY boiled chicken costs $3-5 for a week’s supply and outperforms both. It’s the only category where skipping the middle tier (commercial treats) and going DIY produces the best result.
| Spend on treats (or DIY) $5-10 commercial treats for home training. Boiled chicken for hard stuff. Premium freeze-dried as a convenient middle option. |
Category #3: Clickers, Budget Wins, Clearly
A $2 box clicker and a $15 premium clicker make the same sound. The dog doesn’t know the difference. The only reason to spend more is a specific situation: sound-sensitive dog (wrist clicker), two dogs (i-Click), or consistent multi-environment training (volume clicker). Outside these scenarios, $2 is the correct answer.
| Spend: $2–5 Standard box clicker. Upgrade only if you hit a specific scenario from Section 3. |
Category #4: Harnesses, Budget Wins, With Front-Clip Requirement
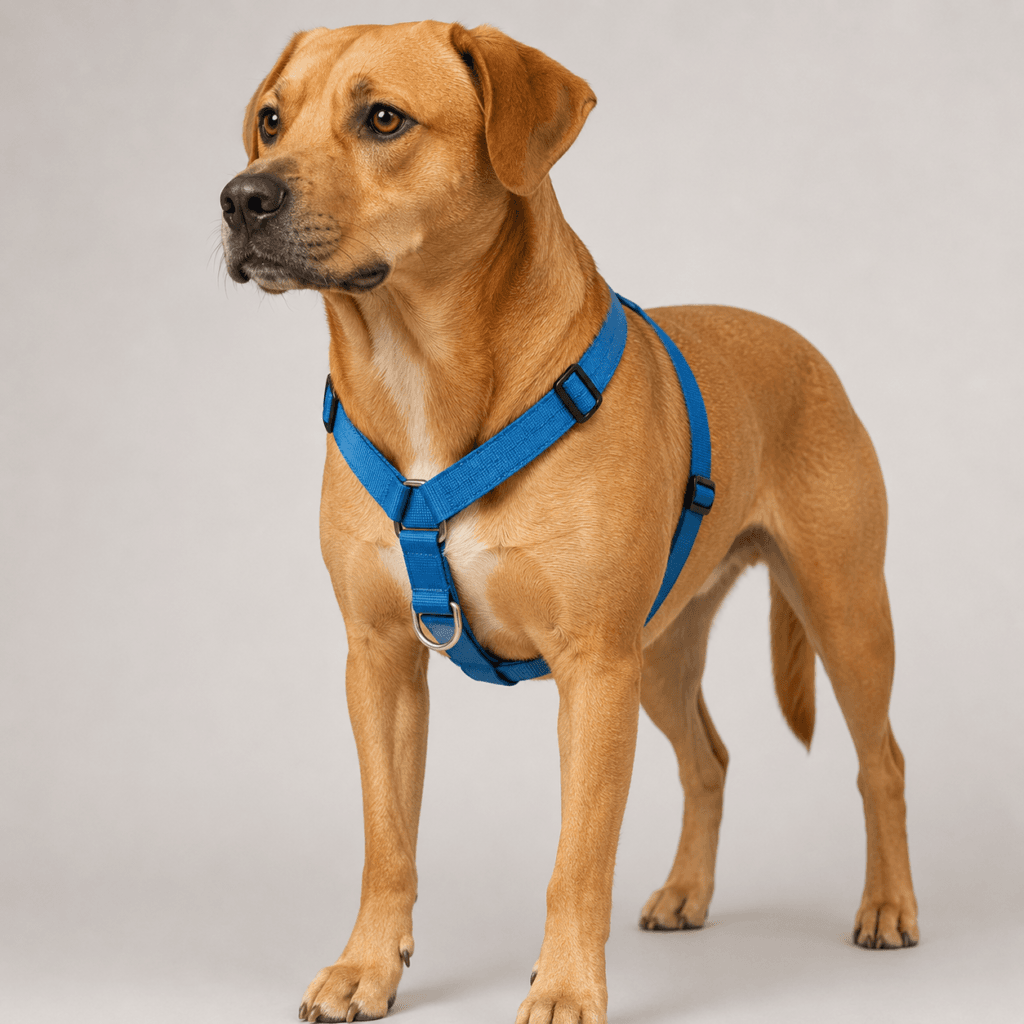
A $20 front-clip harness from Amazon with padded straps does everything a $60 brand-name harness does in terms of pulling reduction. What matters is the clip location (front, not back), padding (prevents chafing), and fit (adjustable on 3+ points). The brand name pays for marketing, not training effectiveness.
| Spend: $20–30 Front-clip harness with padding. Brand name irrelevant. See our treat pouches, clickers, and harnesses guide for specific picks. |
Section 6: Why This $12 Treat Pouch Beat a $40 Option, 3 Reasons
I bought a $40 “professional bait bag” after reading several glowing reviews. Then I happened to buy a $12 basic magnetic pouch to use as a backup. After a week of alternating between them, the results surprised me.
Reason #1: The $12 Pouch Was Faster to Access
Both pouches had magnetic closures, in theory, identical access speed. In practice, the $40 pouch had a design flap over the magnetic opening that required one extra movement to clear before reaching the treat. Across 80-100 training repetitions in a session, that extra movement adds up to meaningful lost seconds and, more importantly, imprecise timing on marking windows.
| Training insight: in positive reinforcement, the treat needs to arrive within 1–2 seconds of the mark. Anything that slows treat delivery, even by half a second consistently, weakens the behavior-reward connection over time. |
Reason #2: The $12 Pouch Was Easier to Clean
The $40 pouch had three compartments, a secondary zipper, and two internal pockets. After a week of chicken pieces, every crevice had residue. Cleaning required a toothbrush to reach the inner zipper tracks. Total cleaning time: 8-10 minutes.
The $12 pouch had one compartment with a wipe-clean nylon interior. Cleaning time: 45 seconds with a damp cloth.
Reason #3: The $12 Pouch Did the Exact Same Job
- Both held treats:
- Both clipped to a belt:
- Both had magnetic closure:
- Poop bag dispenser (only the $40 pouch): Never used it, I carry a separate bag holder
- Key clip (only the $40 pouch): Never used it, my keys go in my pocket
- Second compartment (only the $40 pouch): Slowed access, never used for training
| The Honest Note The $40 pouch was better quality overall: stitching, materials, and durability were noticeably superior. But it wasn’t $28 better for a first-time owner who trains 15 minutes a day. The $12 pouch will last 6–12 months with daily use. If you want something that lasts 3 years, spend $25 on a mid-range with a waterproof liner, not $40 on features you won’t use. |
Section 7: 4 Best Mid-Range Treat Pouches ($15–25) for New Owners
If $20-30 is your treat pouch budget, here’s where to spend it. All four options in this range hit the features that matter (magnetic closure, waterproof liner, sturdy clip) without the overhead of luxury models.
| Pick #1: Best Overall, Waterproof Magnetic Pouch $20–25 | 5/5 Features: Single-opening magnetic closure, full waterproof liner, metal belt clip (not plastic), machine-washable exterior Why it wins: The simplest possible design with the features that actually matter. One opening means the fastest access. Waterproof liner means easy cleaning. Metal clip means it doesn’t break. This is the pouch 90% of first-time owners should start with. Best for: Most first-time owners, daily trainers, any training environment |
| Pick #2: Best for Walk + Train, Convertible Fanny Pack $18–22 | ½ 4.5/5 Features: Magnetic closure, can be worn belt-clip or crossbody strap, internal phone pocket, basic waterproof liner Why it wins: If you regularly train on walks and want one thing on your body instead of two (pouch + phone), this does both. The crossbody option distributes weight better on long walks. Best for: Owners who walk and train simultaneously, anyone tired of managing a phone separately on walks |
| Pick #3: Budget-Mid Hybrid, Simple Magnetic ($12–15) $12–15 | 4/5 Features: Magnetic closure, belt clip, basic nylon (no waterproof liner), lightweight Why it wins: The best option for owners who want a magnetic closure but can’t stretch to $20. No waterproof liner means you’ll need to clean it more carefully, empty and rinse after every session with wet treats. Best for: Tight budget but unwilling to risk velcro failure, occasional trainers who use dry treats (kibble, freeze-dried) |
| Pick #4: Best for Large Hands, Wide Opening Magnetic Pouch $20–25 | ½ 4.5/5 Features: Extra-wide magnetic opening, waterproof liner, sturdy metal clip, slightly larger overall capacity Why it wins: Standard magnetic openings can frustrate trainers with large hands or arthritis. The wider opening removes that friction entirely, which matters when you’re reaching into a pouch 80 times per session. Best for: Owners with larger hands, arthritis, or mobility considerations |
Mid-Range Pouch Summary:
| Pouch | Price | Waterproof | Magnetic | Best For | Rating |
| Best Overall | $20–25 | Yes | Yes | Most owners | 5/5 |
| Convertible/Fanny Pack | $18–22 | Yes | Yes | Walk + train | ½ 4.5/5 |
| Budget-Mid Hybrid | $12–15 | No | Yes | Tight budget | 4/5 |
| Wide Opening | $20–25 | Yes | Yes | Large hands | ½ 4.5/5 |
FAQ: Money-Smart Training Gear Questions
“Do I really need a treat pouch? Can’t I just use my pocket?”
You can use your pocket for the first week. Most owners switch to a pouch after losing several marking moments while fumbling in a jacket pocket. A $12 pouch solves this permanently and costs less than a single training class. The question is whether the fumbling is frustrating you enough to spend $12 to fix it.
“Will my dog know the difference between cheap and expensive treats?”
Your dog won’t read the price tag. They’ll respond to scent intensity, texture, and how novel the treat is. In low-distraction home training, a $6 bag of Zuke’s and a $15 bag of PureBites liver will produce indistinguishable results for most dogs. In high-distraction outdoor environments, the liver will typically outperform the commercial treat because the smell is stronger. Match treat value to environment difficulty.
“How long does a budget treat pouch typically last?”
A $10 budget magnetic pouch with daily use: 6-12 months before the clip weakens or the interior smell becomes permanent despite cleaning. A $20-25 mid-range with waterproof liner: 1-2 years with daily use. A $40-50 premium: 3+ years. Given those lifespans and price points, two mid-range pouches over 2-4 years costs less than one premium pouch and gives you a backup.
“Is it worth buying a clicker or can I just use my voice?”
Your voice (“Yes!” as a marker word) works as well as a clicker for most training scenarios. Buy a $2 clicker if you want extra precision on complex behaviors or if you prefer having a physically distinct marker. Don’t buy a clicker if you’re going to forget it at home, your voice is always with you and equally effective with consistent practice.
“What’s the one piece of gear I should never buy cheap?”
Harnesses, specifically for pulling dogs. A cheap back-clip harness gives a pulling dog mechanical leverage to pull harder. A front-clip harness, even a $20 one, redirects the dog’s momentum and makes positive reinforcement loose-leash training significantly more effective. This is the one category where the cheap option actively works against you.
“My dog destroyed his cheap harness in a week. Should I buy premium?”
Before buying premium, identify what broke. If it was a buckle, a quick-release, or thin straps, yes, that’s a material quality issue that mid-range or premium options address. If your dog is an escape artist or destructive chewer, premium materials will last longer but won’t stop the behavior. A $30 mid-range harness from a brand with good reviews will solve most durability issues without paying for premium branding.
“Are expensive training treats worth it for a picky eater?”
For a genuinely picky eater, yes, but “expensive” doesn’t automatically mean “better.” For picky dogs, the most motivating treats tend to be high-protein, strong-smelling, single-ingredient options: freeze-dried liver or boiled meat. The boiled chicken option is both the cheapest and the most motivating for most picky dogs. Try DIY first before spending $15+ on premium commercial treats.
“What’s the best gear for an owner on a $50 total budget?”
With $50: spend $3-5 on boiled chicken prep (your training treats for the first week), $12-15 on a basic magnetic closure pouch, $2-3 on a standard box clicker, and $20-25 on a front-clip harness from Amazon. Total: $37-48. You’ll have everything you need to start a complete positive reinforcement training program. Nothing on that list requires an upgrade until you’ve been training daily for several months.
Start Cheap. Upgrade What Fails You.
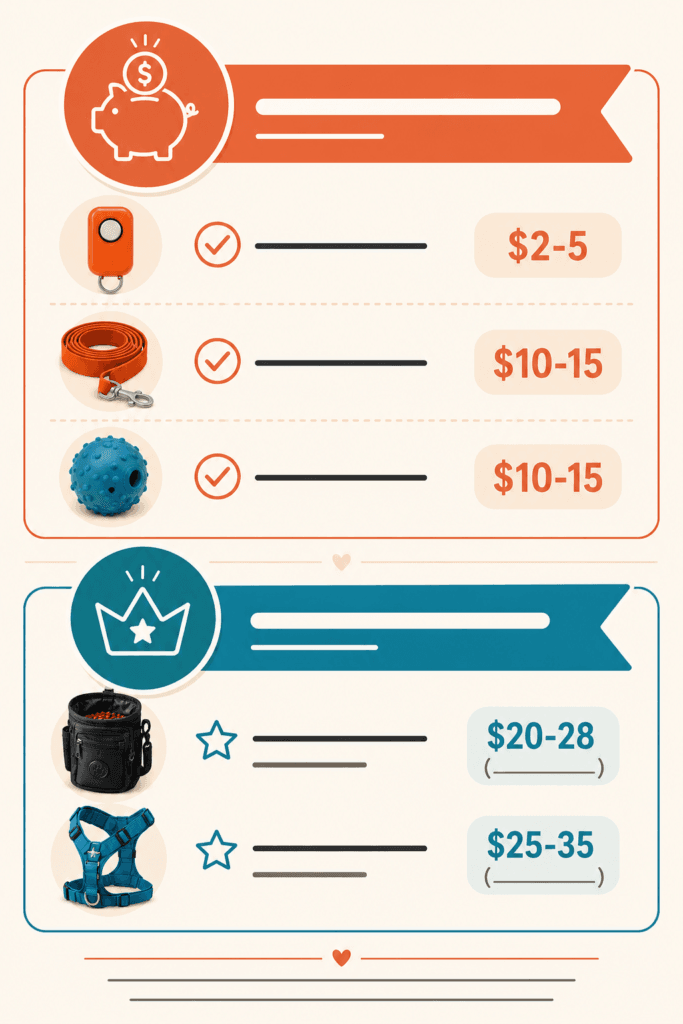
Here’s the complete spending guide in one paragraph: spend $20-30 on a magnetic-closure, waterproof-liner treat pouch (the sweet spot). Spend $5-10 on drugstore training treats, or $3 on a chicken breast. Spend $2-5 on a standard box clicker. Spend $20-30 on a front-clip harness if your dog pulls. Total: $50-65 for a complete, effective, beginner-ready training kit.
The golden rule of training gear: start with the cheapest option that does the job. Upgrade only the specific piece that is frustrating you or failing in practice. Your dog’s progress is determined by your consistency, timing, and reinforcement choices, not your gear budget.
| Download the Free Budget vs. Premium Shopping Guide Want a printable one-page cheat sheet that summarizes every verdict in this article, organized by category, price recommendation, and what to skip? Enter your email below, we’ll send the Budget vs. Premium Shopping Guide straight to your inbox. Print it. Take it to the pet store. Buy only what you need. |
Resources & Series Links
Positive Reinforcement 101 Series
- 5 Reasons Positive Reinforcement Works Better Than Punishment
- What Is Positive Reinforcement? 3 Simple Examples
- The Beginner’s Toolkit: Essential Gear
- First Commands & Daily Routines
- Best Training Gear Reviews 2026
- Treats vs. Toys vs. Praise: What Motivates Your Dog?
- Solving Common Behavior Problems
Recommended Products
- Budget magnetic pouch ($10–15): search “magnetic treat pouch” on Amazon, 4+ star rated
- Mid-range waterproof pouch ($20–25): PetSafe Treat Bag Sport or equivalent
- Zuke’s Mini Naturals, best everyday commercial treat
- PureBites Beef Liver, best budget single-ingredient treat
- Standard box clicker: Karen Pryor or PetSafe ($2–5)
- Wrist clicker: available on Amazon for $6–8
Front-clip harness ($20–30): Freedom No-Pull or equivalent.
5 Comments